
1. Navigate to the Implementation Page
- Login to the Authenticity Leads app.
- For Agencies, navigate to the Clients page, or alternative, select a client from the list at the bottom of the home dashboard.
- If you navigated to the clients page, select a client by clicking on their name, or by clicking the three dots on the left side of the table and “view client”, this will take you to the client dashboard
- You should now be on the Client dashboard for the client you selected. On the bottom right side of the dashboard you will see the “Authorized Websites” box. Select the code icon in the box ( < > ), this will take you to the implementation page for individual websites on the client account.
- Due to differences in most websites, client websites need to be configured individually.
- If you navigated to the clients page, select a client by clicking on their name, or by clicking the three dots on the left side of the table and “view client”, this will take you to the client dashboard
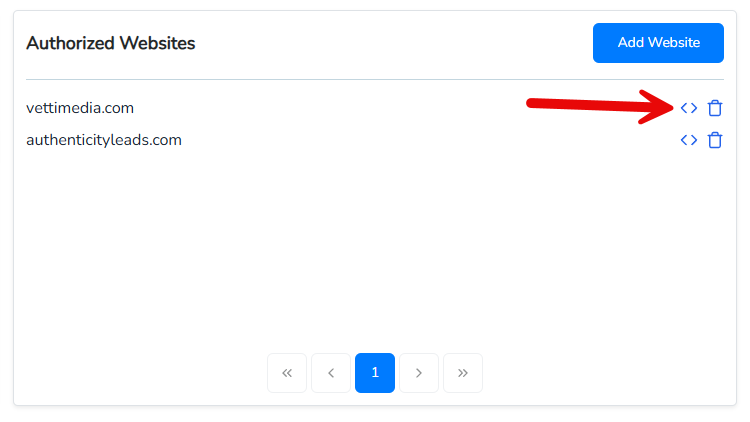
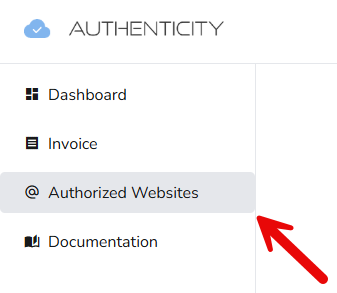
- For Businesses, click on “Authorized Websites” on the left menu pane. Once on the page, simply click the name of any domain in the table of authorized sites. Alternatively, you can also select your domain from the table at the bottom of the homepage dashboard.
2. Configure Features
Authenticity has three primary features, Email Validation, Phone Validation, and Advanced AI Bot Detection. Each feature can be enabled or disabled depending on your individual requirements. When enabled, each feature incurs it’s own API usage. Here’s a brief overview of our features:
- Email Validation: A service designed to improve email deliverability by validating email addresses for accuracy, quality, and deliverability potential. Our comprehensive service checks numerous aspects of an email address to ensure that it is valid, active, and safe to send to. These aspects include syntax validation, domain validation, MX record checks, mail server validation, catch-all domain detection, spam trap detection, abusive email detection, role-based email detection, disposable email detection, free email detection, invalid email detection, toxic domain checks, do-not-mail lists, and SMTP deliverability checks.
- Phone Validation: A service that provides real-time validation and lookup for phone numbers. It focuses on verifying global phone numbers and offering detailed information about their validity and origin. We check numerous aspects of an phone number to ensure that it is valid and active. These aspects include phone number syntax validation, number type detection, carrier detection, country and location detection, line validity checks, caller name, international formatting (E.164 standard), time zone detection, and fraud detection.
- Advanced AI Bot Detection: A service designed to detect bots and automated services used by spammers, scammers, or malicious actors to pollute website traffic and corrupt form submissions with bad or unwanted data. Authenticity bot detection uses device fingerprinting, behavioral attributes, and heuristics combined with AI analysis to detect anomalies and determine if a user is real or a bot. Due to the proprietary nature of our detection algorithms, the exact nature of our bot detection methods are a closely guarded secret to prevent unscrupulous actors from getting the upper hand.
- Bot Detection on Form Interaction: Bot detection may be enabled for all website traffic (we prevent duplicate detection events by only tracking users on a per session basis, once every 24 hours), or only in the event of from interaction, depending on your individual needs. We recommend leaving this setting disabled and monitoring all website traffic in order to prevent any and all bots from impacting marketing pixel data. However, companies with very high traffic levels or those who only run conversion based campaigns may realize the same benefits from only detecting bots on form interaction, which will prevent them from submitting data and keep your conversion audiences clean.
To enable or disable our features, simply toggle each feature on or off:

3. Add Form and Configure Form Selectors
Authenticity is meant to work with any form on any website that allows a person to add a script tag (virtually all websites). To add a form, input the name of your form in the “Form Name” box. You can switch between forms using the dropdown selection above the form name box. We suggest naming your forms after the pages on which they reside. Depending on the features you have enabled, you will be prompted to configure different settings.
All settings require the user to input HTML selector names for specific form elements. These selectors can be either IDs, Classes, or Field Types. For example, an email field selector may be any of the following:
- ID: #email
- Class: .email
- Type: input[type=email]
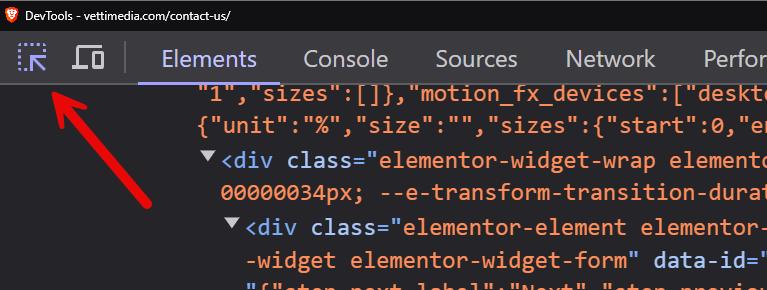
To find your selector names, open any desktop based web browser and navigate to the page with the form you would like to configure. Once on the page, open your browsers “Developer Tools” which are included with every major web browser. You can open these tools with the browser menu, by pressing F12 or “CTRL + SHIFT + i”. Once the developer tools are open, select the “Inspection Tool” by clicking on the “arrow and dotted box” icon on the top left of the developer tools window. Alternatively, you can press CTRL + SHIFT + C to activate this button.
After enabling the inspection tool, move your mouse cursor over the form element whose selector you need. This will be either the phone input field, email input field, or submission button. You will see the elements on your page highlighted as you move your mouse over them.
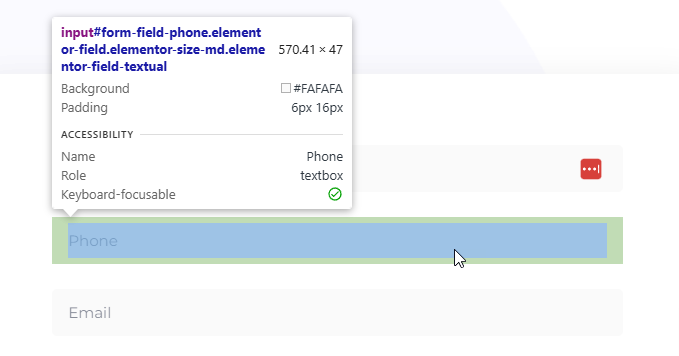
Once, you have the correct element highlighted, click on the element. This will select and highlight the correct snippet of code in the developer tools.
Next, copy the name of the field ID, Class, or Type. You will input this selector name in the Authenticity configuration tool. Remember, IDs and classes must have correct html formatting. ID must have the hashmark (#) preceding the selector name and classes must have a period ( . ) preceding their selector name. If you are using the type field, you only need to add the name to the following: input[type=name].
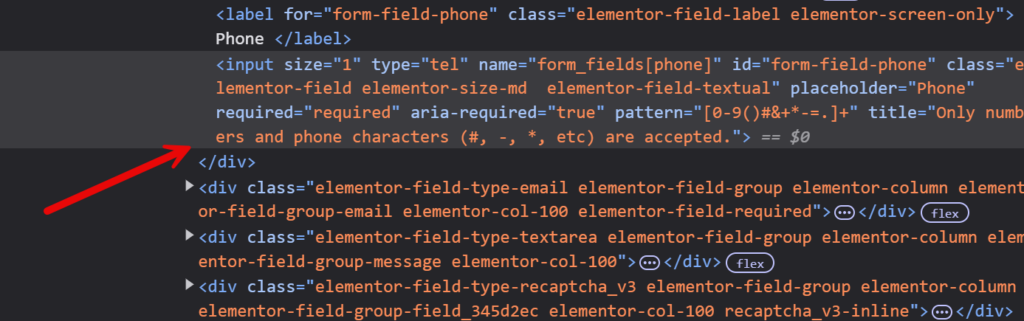
Review the screenshot below:

This is the code element for a phone input field. As an example, this field can be added to the form configuration page in any of the following ways:
Before:

- #form-field-phone
- .elementor-field
- input[type=tel]
After:

For demonstration purposes we’ve added all three selectors to the phone configuration field. You do not need to add all three selectors, however, you can add multiple selectors by separating them with a comma.
It is recommended to integrate your form by adding the ID selector first, then testing the integration. If the ID selector does not work, add the type field (as long as there is only one form on the page), test again, then try the class selector last. For class selectors, it’s critical that only unique classes are added to the configuration field. Page elements often share multiple classes, so you need to be sure the class you’re adding is unique only to the form field being configured.
Once you’ve added the selector for one form field, repeat the process for all form fields required by the features you enabled earlier. When you disable a feature, the settings boxes will change to reflect the required fields. The forms that may require mapping are the email input field, phone input field, and submit button (which is always mapped).
After the form selectors are added to the configuration fields, press “Update configuration” on the bottom of the page to save your settings.
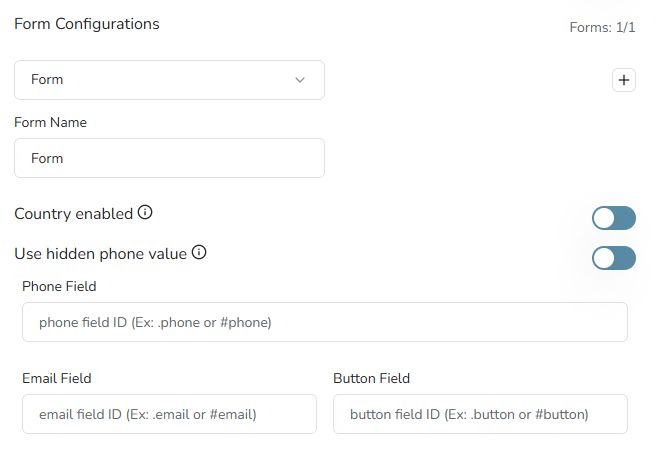
4. Configure Phone Form Settings
For users with the phone validation feature enabled, two options will determine how Authenticity evaluates phone numbers.
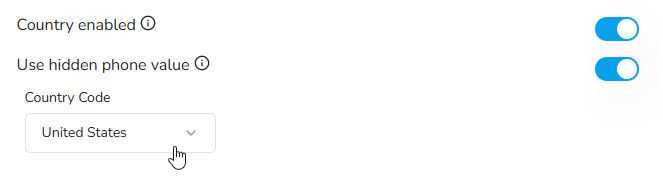
Country Enabled: This option automatically prepends the country code to any number entered into a phone number field. This is particularly useful for forms where a single line text field is used to input phone numbers, or those where a country code is not normally specified (like the US and Canada). All phone numbers checked by Authenticity need to have a country code to be properly validated.

Use Hidden Phone Value: For phone fields with a country code dropdown or separate field to enter a country code. These fields almost always have a “hidden” form field where the country code is combined with a phone number and then submitted as one number. If you have a country code selector on your phone field, you will need to use the code inspector to verify and input the ID of your hidden phone field.
5. Configure Advanced Settings
With the form fields added and configured, now it’s time to consider advanced form settings. For most users, the default configuration will work for the vast majority of forms and thus, these features do not require customization. However, depending on your website and desired script behavior, you may want to change some of these settings. To access these settings simply click “show advanced implementation settings”
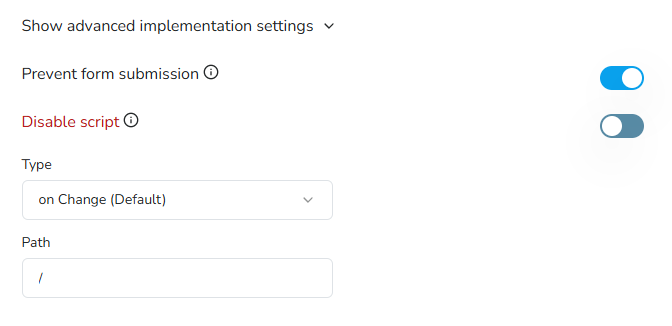
Prevent Form Submission: This setting is enabled by default and prevents forms from being submitted in the event of a detected event like a bot, or invalid email/phone number. Customers who would like the ability to tag form submissions as “suspicious” but still allow all submissions should disable this setting.
Disable Script: This setting disables the Authenticity script from running on your website, allowing for troubleshooting in the event of any disruption or technical problems. This setting is disabled by default.
Type: This setting controls the default Javascript event used to detect when form information should be evaluated with our API. By default, we pull information from your form fields “onChange”, meaning when a user changes from one form field to another. To accommodate the largest possible number of forms and make our service broadly compatible with most technologies, we allow the other following options: onBlur, onClick, and onSubmit. If you have trouble passing data from your form to our API, please try the other options in the order listed.
Path: This setting allows users to set a path restriction for their script, ensuring API calls only come from specific pages on your website. By default, this is set to your domains root directory and treated as a wildcard option, allowing the script to be implemented anywhere on your authorized domain.
6. Save Configuration and Implement Script
Congratulations, you’ve finished configuring Authenticity for your form! To save your configuration simply click the “Update Configuration” button at the bottom of the implementation page. Once you click the button, a modal popup will appear asking you to copy or download your newly generated script.
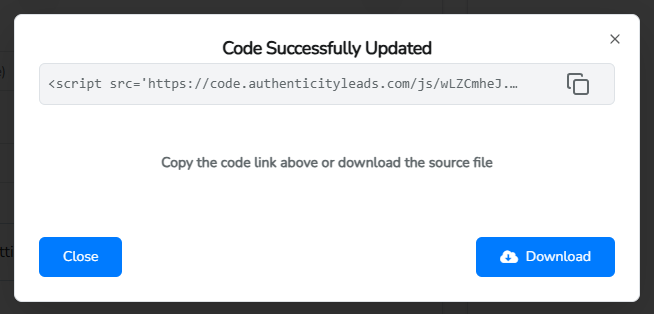
To finish the implementation, simply paste the script snippet before the closing </head> tag in your website header. While not required we recommend implementing the script before any advertising, marketing pixel, or analytics scripts in order to allow bot detection to begin monitoring before any third party scripts and external crawlers are triggered on the site.
To ensure Authenticity is able to evade detection by bots, malicious actors, or script blockers, we give all users the option to self-host our script by simply downloading it and placing it (preferably) in the root directory of your website. Once the file is uploaded, simply replace the URL in the snippet to the location of the script now being hosted on your domain.
Remember, any update to the form configuration will require re-downloading and updating any self-hosted versions of the Authenticity script.
